Pages

Saturday, April 27, 2013

Tomatoes - 3 different flavors

A here, first let's talk about S and her apples....

HEART BROKEN!!! I can't believe all that work for such a huge climax to a big let down. Talk about a disappointment :( I have never canned juice before and I probably won't now that I know it's a lot of work for not a lot of jars for the pantry. I hope, like she, it has made a concentrate and she will be able to expand it. Although if that's the case once she opens 1 jar she is going to have a lot of apple juice on her hands since she can't just stick it back in the cupboard! Perhaps trying a jar over the 4th when our family of 23 is together would be a good time to figure that out. Poor, poor S!! I hope her attempts at canning aren't derailed because of this. It really is such a good way to preserve food and not have to throw anything away.
Let's all mark this up as an experience and can our apples for something else. I hope her tomatoes can better than the apples!

I didn't anticipate the apple juice not working out so I feel kinda bad about this post...

After the marinara sauce I took the night to relax and woke up to 35 pounds of tomatoes staring at my face in the morning. I knew I had to do something quick because I didn't want them to go bad. In the back of my head I knew I wanted to do something on the easy side so I could show my sister's how easy this whole canning process really is. So chopped tomatoes it is! Let's get started (I really, really like pictures...so with me that's what you will get a lot of :) )

 I used 24 half pints so start with. I decided on a smaller jar because they are more recipe friendly. I figure that when a recipe calls for 1 14.5 oz can of petite diced tomatoes I can just grab one these jars without having to think too much about it :) It's all about EASY in my household!
 Take all those jars, lids and rings and toss them in your dishwasher to clean and keep hot until you are ready to use them.
 Fill a pot with water, put it on the stove and bring it to a roaring  boil!
 While the water is on the stove and your waiting for it to boil cut an "X" into the bottom end of each tomato. This will change your life when you need to peel them!
 Keep cutting X's into all those precious looking tomatoes.
 While I was waiting for my water to boil I also started warming the water in the canning pot. This takes awhile and I like to be ahead of schedule instead of behind so I always warm my water in the beginning. When it boils I turn the heat to medium so it simmers until I'm ready to throw my jars in then I bring it up to a boil again!
 FINALLY the tomatoes are X'ed up!
 When the water is boiling put in some tomatoes...I do about 15-25 at a time. I do them in batches so when I'm peeling one batch there is another getting ready for me...
 After about 2-5 minutes in the water the skin will start to peel away (sorry if the picture doesn't show it very well). When this happens put the tomatoes in cold water. I used my sink because it's big enough and I was running out of big pots...and it's one less thing I have to clean.
 I put the skin of the tomatoes in my other sink and threw them all away at the very end. 
 These are what the tomatoes look like after they are peeled. I was just putting them in my other big canning pot!
 When all the peeling is complete this is what my set up looked like. The peeled tomatoes are in the big pot on the right. All I'm doing to cutting the top off the tomato (throwing it away) and putting it whole into my food processor.
 It took awhile but I only did about 7 at a time to get the chunkiness I was looking for. 
 When all the tomatoes are chopped put them in a pot because you are going to have to heat them up. I have 3 different containers here because (you guessed it!) I made 3 different kinds! I made a plain with no seasonings (in the green container), in the left I made a Mexican flavor and in the right pot is an Italian flavor. Those recipes are at the end of the post!
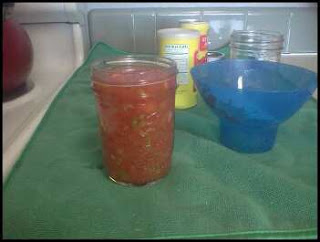
 While the tomatoes are coming to a boil on the stove get your tools ready! On the left is a funnel...this is KEY!! It will make your life easier then trying to fill jars without. And I have citric acid on the right. You'll need to add some to the jar before filling it with tomatoes.
 Take a hot jar out of your dishwasher and add the acid (I added 1/8 tsp) now put the funnel on top
 Fill the jar with the hot tomatoes leaving the suggest amount of head space (this was about 1 inch)
Put the lid and ring on and twist until tight.

 When your jar is filled use your canning tongs to lower the jar into the hot water
Once all your jars are in hot water put the lid on the pot and bring the water back up to a boil.
 Once the water is boiling set your timer for the suggested amount of time. These small jars required 15 minutes of processing time
 When the time is up take them out of the water and let them sit on your counter for 24 hours. You will start to hear the lids pop. Once they do you know they sealed correctly. If one of the jars doesn't pop just put it in your fridge and use it within a week.
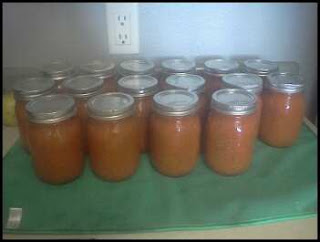
These are all the ones I did. 39 half pints :) I was super pleased with the result and can't wait to make something with them!!

After 24 hours of sitting on my counter I wrote on the lid what flavor of tomatoes and the month and year I made them. You can't re-use the flat lid for future jars so since I have to throw them away I do all my writing on them and not the jar itself.

*For the Mexican tomatoes I added half a stalk of chopped celery and about 7 sweet peppers. I just threw them in my food processor and added them to the tomatoes. Then I added 2 tsp of each of the following ingredients sugar, salt, onion powder and garlic powder

*For the Italian tomatoes I added half a stalk of chopped celery. I just threw them in my food processor and added them to the tomatoes. Then I added 2 tsp of each of the following ingredients sugar, salt, garlic powder, onion powder, oregano and basil

Hope this was easy to understand and that I didn't make it too complicated looking!!

Friday, April 26, 2013

1st attempt at canning...umm...WHAT?!

Hey everyone...S here!

If you couldn't tell by the previous post, A is into canning foods. I decided that I'd give it a try...I mean it's got to be more productive than playing Candy Crush on my tablet and watching Disney Jr with the kiddos all day, right?!

So, like most of my new ventures I don't have the foresight to start off on a small project to see if I dig it or not...nope, I dove in to the deep end...with blood thirsty canning sharks, with an open bleeding wound...just tempting the damn savages to take a bite. And would you know it, they did...go figure. I bought 50 pounds of apples and 25 pounds of tomatoes...first mistake. WAY TOO MUCH PRODUCE FOR A FIRST TIMER!!! I've been canning for 2 full days now and I am 1/2 way through both the tomatoes and the apples...and I have VERY little to show for my efforts.

 
The first recipe I started with was Apple Juice. Sounds simple, right? I thought so too. The recipe is literally 2 ingredients. How do you fuck that up?! I don't know...but I did. Lets take a walk down memory lane and recall the last 2 days of my apple juice making adventure...come, join me.

First, the recipe calls for 24 pounds of apples and 8 cups of water...and this is supposed to yield 6 quarts of juice. I don't want to spoil the ending, so I won't tell you how much juice I got...nothing worse than a premature climax to a great ride...right?! I was hesitant because I thought that sounded like an awful lot of apples for very little juice. But my family isn't big on Apple Pie or Apple Butter...and I am going to make Apple Sauce...so I thought, the kids will love them some home made Apple Juice, so why not...I do have 50 pounds of apples I have to burn through after all. Finding the recipe was the only thing I thought I did right. After that I derailed at every turn.

 
I went out and purchased a 12 qt stock pot because I didn't have anything bigger than a 6 qt pot in my house. So I am chopping away at the apples and thinking something like, "If I can chop these bad boys this fast, I'll be done in no time. I'm such a natural with picking up new crafts and hobbies. I'll be teaching A a few tricks in 3 weeks when I go visit her...blah, blah, blah..."

 
So an hour into chopping and my new stock pot is about 2/3 full and I weigh it because I don't want to cut more than the 24 pounds required for the recipe. At this point I am literally thinking that I've cut 23 pounds worth of apples and I only have a few left to go...So I put it on the scale and it registers 8 pounds...I'm just going to pause there because it needs to sink in...8 God damned pounds in an hour and I've already used up 66% of my brand new stock pot...well shit.
 
 
It looks like I'm going to have to make 2 batches of this stuff to use all 24 pounds. Fast forward an hour and I finally have 1/2 of the apples needed for the full recipe cooking on the stove.
 
 
Now I need to dive in to chopping the 2nd half of the fruit. Ugh!
 
 
I want to give everyone a brief glimpse into my morning shopping spree in order to get all of the equipment and ingredients needed for this little project. I went to the store and was getting everything needed when my 6 week old baby starts to have a melt down in the store. People are going out of there way to see who is murdering the baby in the home goods section (that may be a bit of an over exaggeration...but we all know that's what it feels like when you're in the middle of it). And for some reason WalMart decided to have a secret scavenger hunt for cheese cloth that day...lucky me. And wouldn't you know it, I lost the scavenger hunt. I couldn't find it ANYWHERE!
 
 
So I had to Jimmy Rig a strainer lined with coffee filters suspended over a bowl using wooden spoons. I'm kind of proud of my handy work to be honest.

 
Oh, and the 24 pound BS has now come back to haunt me, again. I can't just create 1 contraption for draining juice...nope that won't hold all of the apples, so I need to set up 3 separate draining pots...fantastic!

After both batches of apples were finished they had to drip in the coffee filter set up for a couple hours before I could begin the actual canning process. I took Dad-o out to dinner and came back fully expecting to see 6 quarts or more of juice resting in the bowls and do you know how much I got...you know what...still too premature for the climax...er, reveal...


At this point I still need to reheat the juice so I put it back of the stove and start to prep the cans. Once the juice is heated I fill the cans and start to boil them for 10 minutes.


There was an extra 2 inches of space between the top of the water and the rim of my MASSIVE canning pot, but wouldn't you know, it still managed to boil over. Yep, this girl even struggled with boiling water on this adventure...(this is my attempt at a picture showing the water running down the front of my stove, all over the stove top, down my cupboard, and creating Lake CanCan on the floor of my kitchen.

So with all of this work, 4 hours of chopping, multiple batches, the screaming child creating a panicked straining contraption, the new lake in my kitchen, and do you know how much juice I made?!

 
2 FUCKING QUARTS!!! I essentially just spent $12 on 2 damned quarts of apple juice. I'll be honest, I haven't even tasted it yet. I'm a bit nervous what I will do if they taste horrible. If that happens I may end up in the fetal position slowly rocking back and forth in the middle of my kitchen mumbling incoherently to myself...just saying. My hope is that I've made an apple juice concentrate inadvertently and I can stretch those 2 quarts into the 6 quarts that they are actually supposed to be. So for the mean time I'll just look upon those 2 lonely quarts with disgust and know that somewhere along the line I'm the chick that shit the bed (pardon the expression) with a 2 ingredient recipe. In the end I've determined that I will likely not be purchasing apples in bulk for canning purposes in the future.

 Thanks for joining me on my adventure!!! I hope one of us enjoyed it :)

~ S

Tuesday, April 23, 2013

Homemade Red Sauce

A here, one of my new favorite passions is canning. I love preserving food and wasting nothing! Vegetables and fruits are so expensive at the grocery store that (to be totally honest) I wouldn't buy them on a regular. One of my very best friends introduced to this amazing co-op called Bountiful Baskets. I have been religious about ordering my fruits and veggies from them every Monday. They have these amazing deals so when something good comes along I try to take advantage...that brings me to this post. Today I made my very own marinara sauce. S told me about the recipe, you can find the that here. I increased the original recipe to use 15 pounds of tomatoes. Prepare yourself for lots of pictures!!
Preheat oven to 400

 Start with garlic...

Cut it in the middle, place halves on some foil and drizzle with olive oil
Fold the foil around the garlic and place on a cookie sheet.
Now take your tomatoes. I used Roma...I'm not sure if these are the ideal tomato but it's what I used and I think it turned out just fine :)
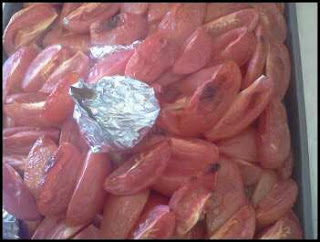
Quarter your tomatoes and place them on the cookie sheet.  Then place them in the oven for 30 minutes. You should see the skin coming off the tomatoes and at this point it should be super easy to peel it off. I had a lot of tomatoes in there so I left them in the oven for 55 minutes.
When the tomatoes are done roasting they will look something like this...
This is where the process really began for me!! You need to skin the tomatoes and seed them. It was easiest  for me to throw the skins in my skin, strain the seeds in the colander (on the left) and put the tomato in the pot (on the right)
This is what I had after the tomatoes were skinned and seeded. I  put all the juices that where on the cookie sheet and drained from the seeds in the pot as well.
Chop some onion and carrot...(I used my food processor)
Saute the onion and carrot in olive oil until the carrot is tender and the onion is translucent
While that is sauteing, take the garlic out of the foil packets and squeeze the heads out. 
Add the tomatoes and garlic to the onion and carrot.
This recipe calls for WHEAT beer...this is the flavor I used :) 
Now add the beer to the tomato mixture :) I forgot to take a picture but you will also add salt, pepper and basil. Bring it up to a simmer and let it cook until your desired thickness. If you want you can leave it chunky or blend it. I choose to blend it simply because I didn't chop the tomatoes earlier and the garlic was in too big of pieces for me. Had I chopped the tomatoes into chunks and minced the garlic I probably wouldn't have blended the sauce. 
Now the fun begins. I had two pots going at this point. The gray for the sauce and the black for the canning process. The black one has water simmering. While the sauce was thickening I was washing my canning jars. I washed them first because my dish washer was running while I was making everything and I only wanted to have to run a short cycle to keep the jars warm.

 I ended up using 16 pint jars...the picture is only of 12. 
Here is the end result! I am planning on doing some more canning tomorrow so I will post pictures of the entire canning process then with more detail about what to do and everything!

Hope you enjoy the sauce :) looks like we have lots of pasta and pizza to make in our future :)